


Introduction
Hello everyone, this is my very first technical article and I am starting on Hashnode. Yayyyyy.
This article is mostly for those who are not familiar with deployment on Heroku or those who have not deployed complex projects on the platform.
The assumption made in this article is that you have a Heroku account and have installed the Heroku CLI. If you have none of those, you can start here.
Also, it is assumed that you have deployed an application on Heroku. If you have not, you can check out how here .
What are environment variables?
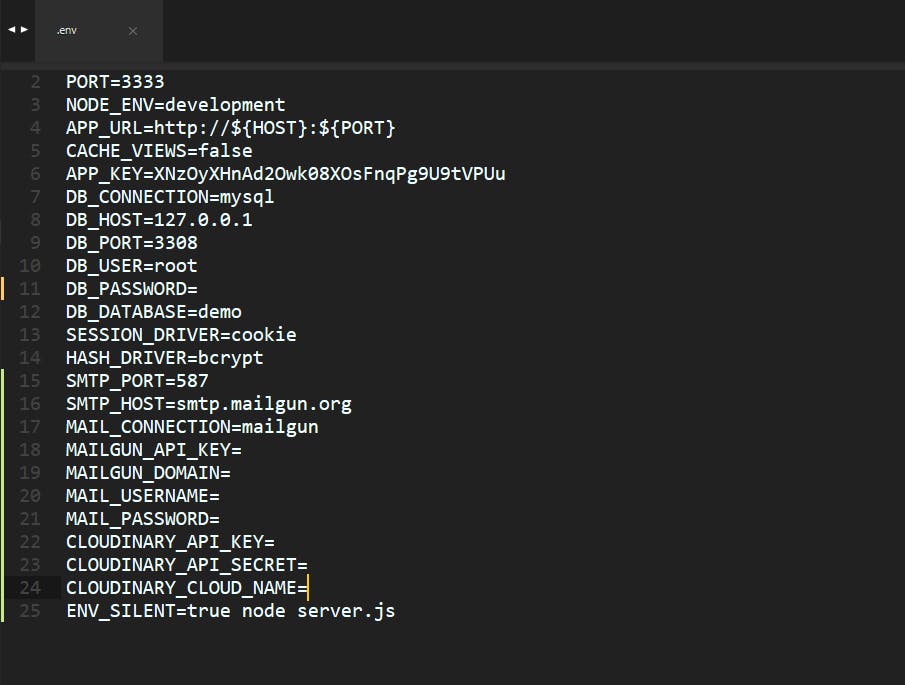
When working with back-end frameworks like Laravel or AdonisJS or Django it is likely that most connections to external infrastructure are done locally via the .env file.
This where you store values required for database connection such as database name, database password, and database username. It stores values like this for various other things like for mail drivers, cloud platforms like Cloudinary, and so on. Those variables are referred to as environment variables.
Production Issues
When you run your application locally like that, it works fine. However, when you deploy your application to a hosting platform, or more specifically, Heroku as in the case of this article your application runs into some form of errors either during deployment or when you try to use it in production.
How to Fix It
These issues arise because .env files are generally not used by most hosting platforms. To fix this on Heroku, there are two ways: The Heroku CLI or the Heroku Dashboard
Using the Heroku CLI
You need to add the essential environmental variables from your .env file. Adding them using the Heroku terminal is simple and straightforward. Write in the terminal:
heroku config:set ENV_VARIABLE=value
Where the ENV_VARIABLE is the environment variable name and the value is the value of the variable as in the .env file.
Like so you can set all your environment variables one by one to prevent or solve problems in your application.
Using the Heroku Dashboard
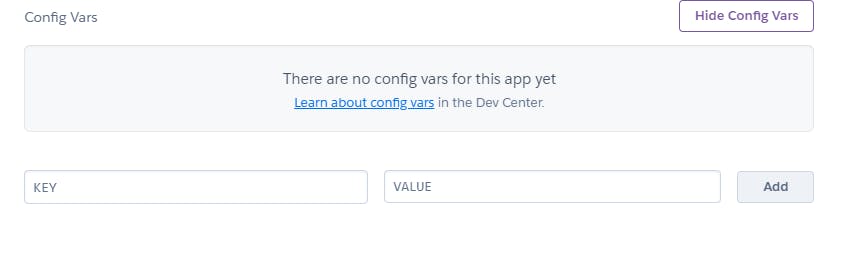
Frankly, this is the easier path to take. When you log into your Heroku account and select that application and in on the tabs of the dashboard, select the Settings tab.
Then, you click on a button that says "Reveal Config Vars". Then, a key-value pair box appears where you can add your environment variables and save. It looks something like this:
Conclusion
I hope this article has helped you to solve this issue which took me 2 days to figure out on my own.
I hope this article is the beginning of many great ones to help those that are on this journey with me.
Thank you for reading. Please leave a comment, if you have one.
Till next time,
I remain,
Oluwadara, OLOYE.